- 品牌/型号:STARTALKETR/MC800X80
- 结构:单筒望远镜
- 功能类型:普通望远镜
- 用途:天文望远镜
- 仪器放大倍数:25-120
- 装箱数:4
STARTALKETR
MC800X80马卡式望远镜使用说明书
一、产品特性
MC800X80望远镜采用现有最好的折反式光学系统原理进行设计,成像为正像,整套光学系统采用多层宽带绿膜,具有镜体短、重量轻、成像清晰等特点,产品采用双调焦方式调焦,镜身快调与目镜精调两套调焦系统,消除了原有折反式产品的像位移。
目镜采用成像质量好,视场角度大的目镜,因此可观察太阳系内的星体,也便于旅游、观鸟、观景,产品的目镜采用锁紧方式,并且可以相机的卡口连接,方便产品的拓展使用。可与数码单反相机连接,也可置换其它的1.25″的目镜。
二、主要技术指标
型号 | 目镜焦距(㎜) | 物镜焦距(㎜) | 放大倍率 | 视场角度(°) | 出瞳距离(㎜) | 出瞳直径(㎜) | 分辨率(″) |
MC800X80-Ⅰ | PL16 | 800 | 50 | 0.85 | 18.9 | 1.8 | ≤2.8 |
PL32 | 25 | 1.7 | 3.6 | ||||
MC800X80-Ⅱ | 15-30 | 27-54 | 0.96-1.25 | 1.4-2.7 | |||
MC800X80-Ⅲ | 10-30 | 27-81 | 0.64-1.25 | 0.9-2.7 | |||
MC800X80-Ⅳ | 7.5-19 | 42-107 | 0.48-1.2 | 0.7-1.75 |
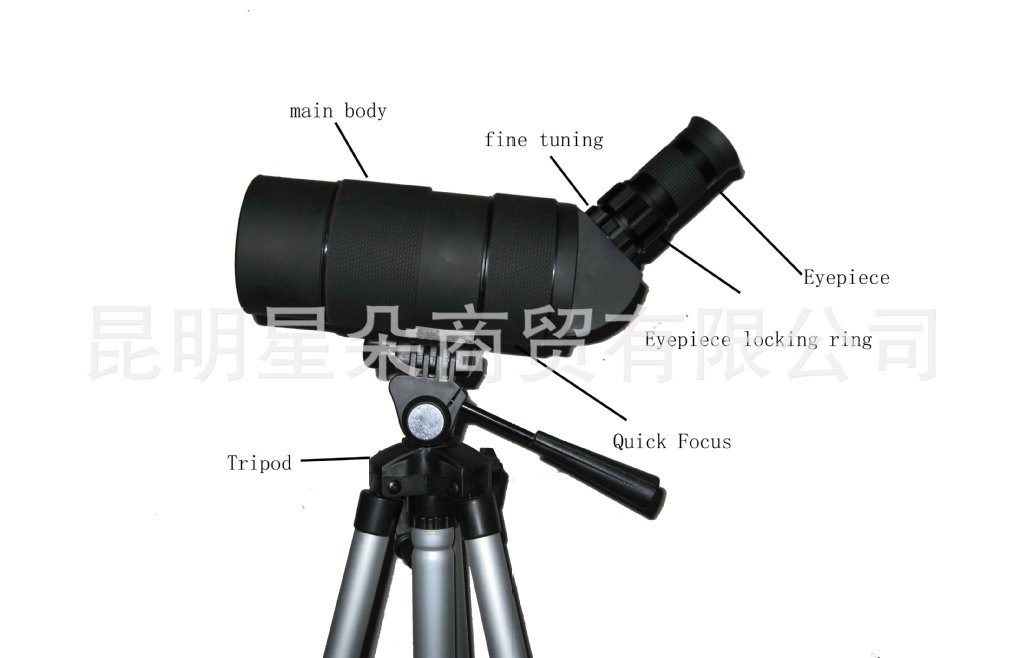
三、产品示意图


四、产品配置清单
型号 | 目镜 | 主镜体 | 说明书 | 脚架 | 软包 | 彩盒 | 备注 |
MC800X80-Ⅰ | PL16 | 1 | 1 | 1 | 1 | 1 | 近距离,观景、观鸟 |
PL32 | |||||||
MC800X80-Ⅱ | 15-30 | 中距离观景 | |||||
MC800X80-Ⅲ | 10-30 | 中远距离观景 | |||||
MC800X80-Ⅳ | 7.5-19 | 远距离观景,观星 |
五、可选配部件
PL40㎜、PL26㎜、EE300、EE130、相机卡口、相机支架等配件。
六、安装方法
1、从包里取出三脚架,把三脚架拉伸至合适的高度,张开至最大位置,放于安全平稳的地方制紧所有的螺钉。
2、把主镜体取出来用三脚架的螺钉直接牢固连接主镜体,拧紧连接螺钉。
3、把目镜取出后把目镜锁紧圈松开目镜放入后一支手握住微调手轮,另一支手旋转目镜锁紧圈锁紧目镜。产品便可以开始使用了。
七、使用方法
1、调节三脚架高度到适合自己方便使用观察的高度固定。
2、转动或俯仰主镜体,对向远端目标,旋转快速调焦手轮至目标基本清晰,然后旋转微调手轮至目标最大清晰,以便获得观察目标的最大清晰度。
3、更换目镜或是旋转变倍目镜的变倍手轮可改变望远镜的放大倍率,从而改变目标成像的大小,由于观察环境的关系,不是倍率越大看得越清楚,所以可以根据自己观察的目标与实际效果更换目镜。
八、维护和保养
1、本产品是精密光学仪器,不要碰撞和剧烈震动,调节时应均匀用力。
2、使用产品时应尽量保证产品的清洁,不要让灰尘、雨水落在光学表面。当光学表面有灰尘或污点时,先用软毛刷轻轻扫掉灰尘,再用擦镜纸或绒布轻轻擦拭,扫除灰尘。
3、从低温度环境到高温度环境应放置二小时以上,以避免光学表面起雾。
4、切勿将望远镜直接对向太阳及焊弧等强光目标,更不能对其进行观察,否则会伤害你的眼睛。
5、本产品应保存在干燥,无日晒的地方,整机部件拆卸后将难以恢复到原有性能。请勿自行拆卸,产品如果有问题的话请找专业人员修理。
注意:本仪器不能直接观察太阳
否则将会损伤您的眼睛
MC800X80 TELESCOPE / SPOTTING SCOPE USER GUIDE
MC800x80 scope series are featured with refra-reflect objective lens which makes the instrument shorter, lighter, non-chromatic aberration and more powerful. It combines telescope and spotting scope two in one.
The scope adopts the Maksutov-Cassegrain system, with a large 80mm objective lens to let in more light. The whole optical system is fully multi-coated with broadband green coatings to achieve the best image clarity.
The dual-focus adjustment system provides a fast and accurate focus for a sharp, crisp image.
The scope models (as shown in the Table below) are equipped with a series of top quality wide-field eyepieces for a broad range of applications such as astronomical observations, nature viewing and bird watching. The scope is designed with a unique eyepiece fitting system for secure and centralized eyepiece positioning, and it is adaptable to digital cameras for digi-scoping, with camera adaptors as optional accessories. It can also fit different types of eyepieces with 1.25²(31.75mm) fitting diameter.
Model | Eyepiece focal length (mm) | Objective focal length (mm) | Magnification | Field of view (°) | Eye relief (mm) | Exit pupil (mm) | Resolution (²) |
MC800X80-Ⅰ | PL16 | 800 | 50x | 0.85 | 18.9 | 1.8 | ≤2.8 |
PL32 | 25x | 1.7 | 3.6 | ||||
MC800X80-Ⅱ | 15-30 | 27x-54x | 0.96-1.25 | 1.4-2.7 | |||
MC800X80-Ⅲ | 10-30 | 27x-81x | 0.64-1.25 | 0.9-2.7 | |||
MC800X80-Ⅳ | 7.5-19 | 42x-107x | 0.48-1.2 | 0.7-1.75 |
1 | Objective lens |
2 | Main scope body |
3 | Main focus wheel |
4 | Fine focus knob |
5 | Eyepiece |
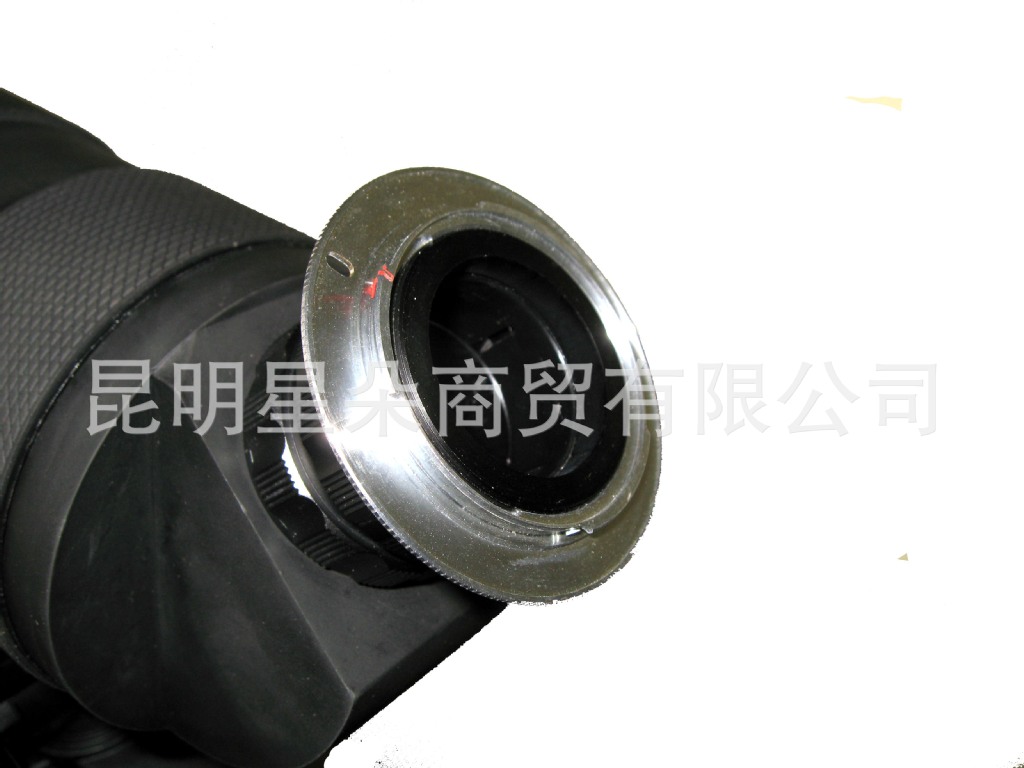
6 | M42x1 outer thread for camera mount connection |
7 | Eyepiece tightening knob |
8 | Tripod |
Figure 1: Major components
2.Product Packages
Model | Eyepiece | Applications* | Package Contents |
MC800X80-Ⅰ | PL16mm | For close to medium range observation such as bird watching, nature viewing and archery. It can also be used for digi-scoping by attaching a digital camera to the large 32mm eyepiece. | All these scope packages include the main scope, a large tripod, a soft carry case, lens cap, lens cleaning cloth, user guide, and the relevant eyepiece(s) for the model selected. All packed in acolourprint box. |
PL32mm | |||
MC800X80-Ⅱ | 15-30mm zoom | For close to medium range observation as a spotting scope. | |
MC800X80-Ⅲ | 10-30mm zoom | For close to long range observation as a spotting scope and telescope for land and sky viewing. | |
MC800X80-Ⅳ | 7.5-19mm zoom | For long range viewing such as astronomical observations. |
*Applications are for reference purpose only and these can overlay over the distance and/or the type of objects observed.
3.Installation
(1)Set the tripod at appropriate height, extend the tripod legs to a maximum angle and lock them securely. Place the tripod steadily on the ground.
(2)Stabilise the scope on the tripod by tightening the tripod connection screw.
(3)Loosen the eyepiece tightening knob, insert an eyepiece into the eyepiece holder, and tighten the knob while holding the fine focus adjustment knob to keep it steady. The scope is now ready for use.
4.Operation Method
(1)Adjust the central column of the tripod to your preferred height as necessary. Care must be taken to keep the tripod legs steady and locked.
(2)Turn the tripod host in azimuth and vertical direction as necessary in order to locate a target in the distance (do not over tighten the tripod direction adjustment screw or the part can be damaged).
(3)Turn the main focus wheel until the image becomes clear. Adjust the fine focus knob to achieve better image clarity if necessary.
(4)You can use different eyepieces or adjust eyepiece zoom (when applicable) to achieve various magnification levels. However, as a fundamental law of optics, at higher powers an image will always be dimmer and less sharp. Therefore, it is best to start viewing with the lowest power eyepiece (longest focal length or lowest zoom level). You can then switch to a higher power eyepiece (or adjust to higher zoom) as you become more familiar with the scope.
5.Optional Use
(1)Use a digital eyepiece for digi-scoping: the scope’s eyepiece barrel can be fitted with a 1.25²digital eyepiece for photograph taking and video recording (shown in Figure 2).
Figure 2: Fitting of the digital eyepiece
(2)This scope can also connect to digital cameras by means of camera adaptors or camera mounts. These can be either inserted into the 1.25²eyepiece barrel (shown in Figure 3a) or fitted to the M42x1 outer thread of the eyepiece holder (Figure 3b). You can also use a universal camera adaptor to connect a digital camera to this scope.
(a)Connection of camera adaptor (b) Connection of camera mount
Figure 3: Fitting of camera adaptor (a) or camera mount (b)
6.Optional Accessories
(1)Fixed power eyepieces: PL10mm, PL20mm, PL 26mm, PL40mm
(2)Barlow lens: 2x
(3)Digital eyepiece: EE300
(4)Camera adaptors/mounts
(5)Universal digital camera adaptors
7.Maintenance
(1)Because this is a piece of precise and delicate optical instrument, please adjust the system with care and prevent the device from shock and vibration.
(2)Keep the optical surface clean if possible. Use a soft brush and lens cleaning cloth to clean the cope and the lenses when necessary.
(3)To prevent damp from fogging on to the lens, please keep the scope in a warm environment for up to two hours after it is used in a cold and damp environment.
(4)When not in use, the scope should be kept in a dry place and not exposed to direct sunlight. Please do not disassemble the scope or you would be unable to put it back to its original setting. Repair services should be carried out by optical specialists.
8.Warning
Do not use this instrument to directly observe the Sun or other bright, light-emitting sources (unless you use the proper solar filter), or your eyes can be damaged.


